What is OpenStack Horizon..
The Openstack platform has its own OpenStack Horizon web GUI in which users manage computing resources, networks, block devices, and other virtual infrastructure components.
The virtual server in OpenStack Horizon can be launched from various sources:
- an image uploaded by the user to the Glance image service;
- a separate disk (volume), which is provided by the Cinder block storage service;
- a virtual server snapshot, Openstack provides the possibility to save the current state of any connected virtual server, so that new virtual servers can be downloaded from it if you need;
- an image snapshot, Openstack provides the possibility to save the current state of any image, so that new virtual servers can be downloaded from it if you need;
- a separate disk snapshot (volume snapshot), Openstack provides the possibility to save the current state of any separate disk in order to download new virtual servers from it if you need.
While creating a virtual server a certain amount of resources is being allocated and provided to the server, which is determined by the template (flavor). Namely here you can set the number of virtual cores, the virtual memory amount, and the disk space size.
We will present you the most commonly used way to create a virtual server from an image.
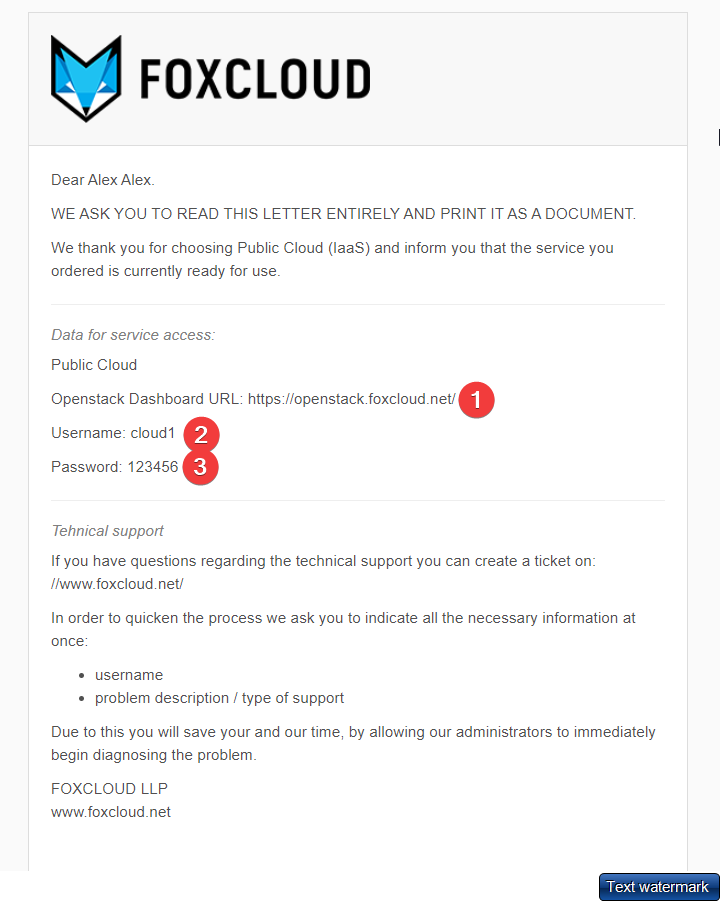
- Open the "PublicCloud" service activation email:
click on the link next to "OpenstackDashboardURL" (step-1)
in the window that opens, in the "UserName" field, enter the "Username" (step-2)
in the "Password" field enter the "Password" from the service activation email (step-3)
and click on the "Connect" button.

- The Horizon control panel will open.
In the drop-down list of regions (step-1) select the region you need, for example, "NL2" (step-2).
- Click on the "Instances" tab, which displays a list of the user's virtual servers in the current region.
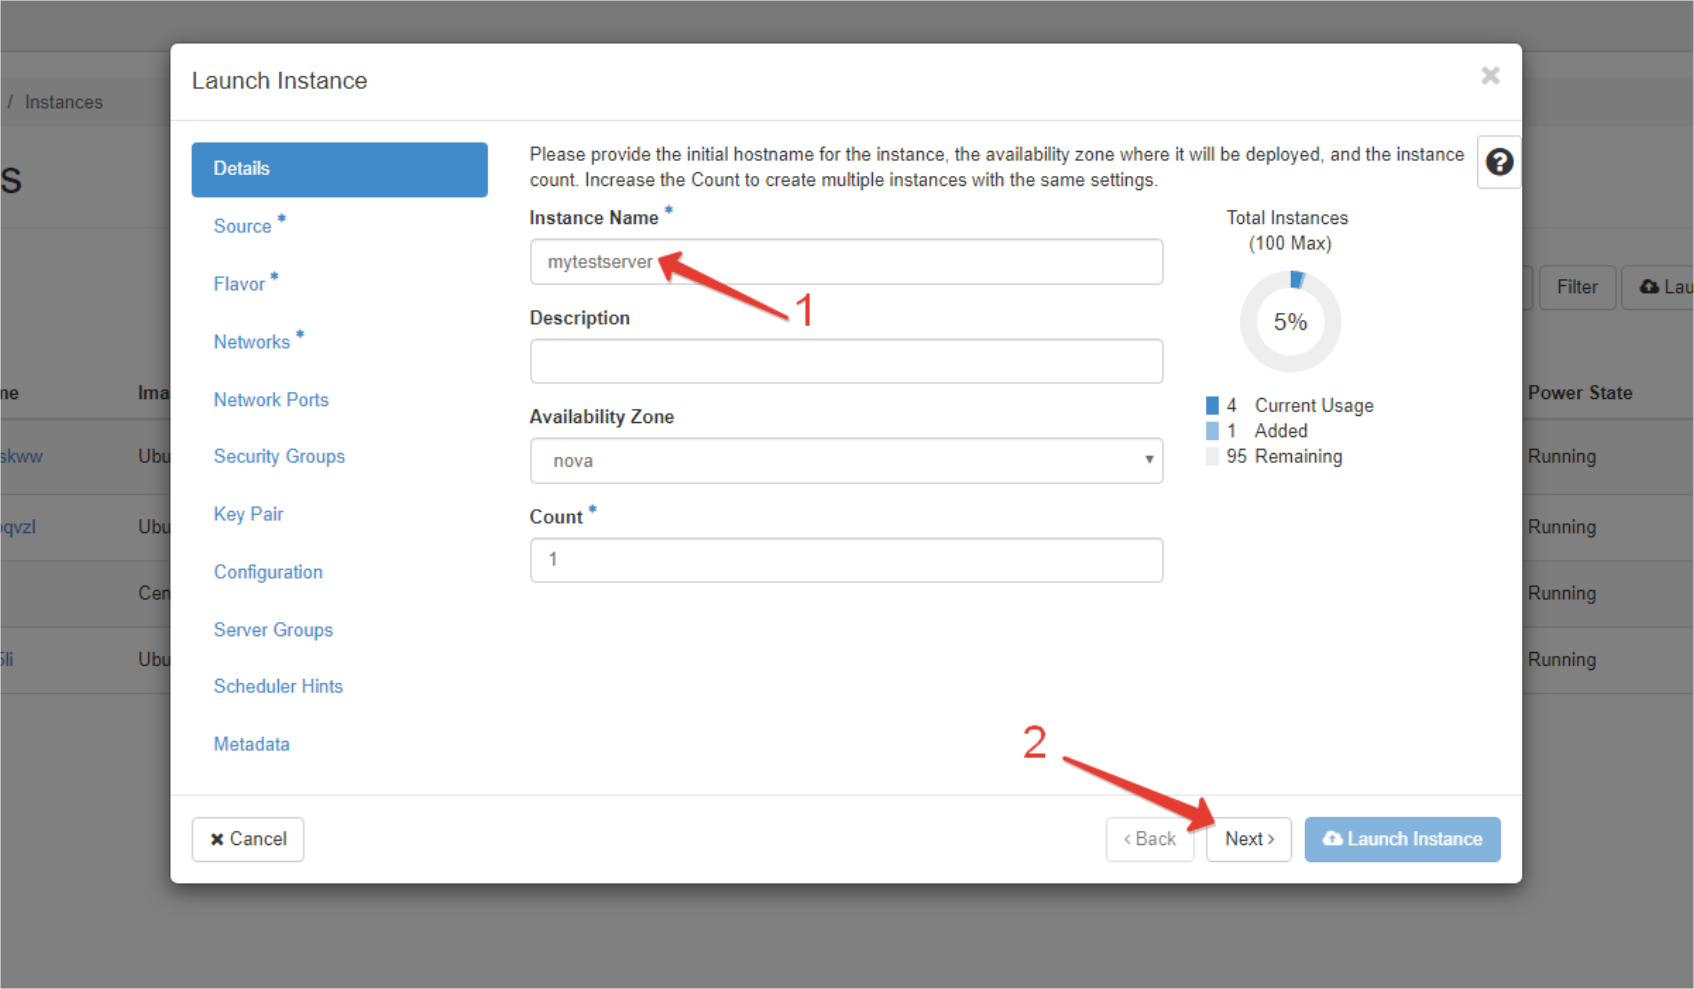
- Click on the "Launch Instance" button. A window for creating a new server will open.
- Enter the name of the virtual server in the "Instance Name" field (step-1) and click on the "Next" button (step-2).
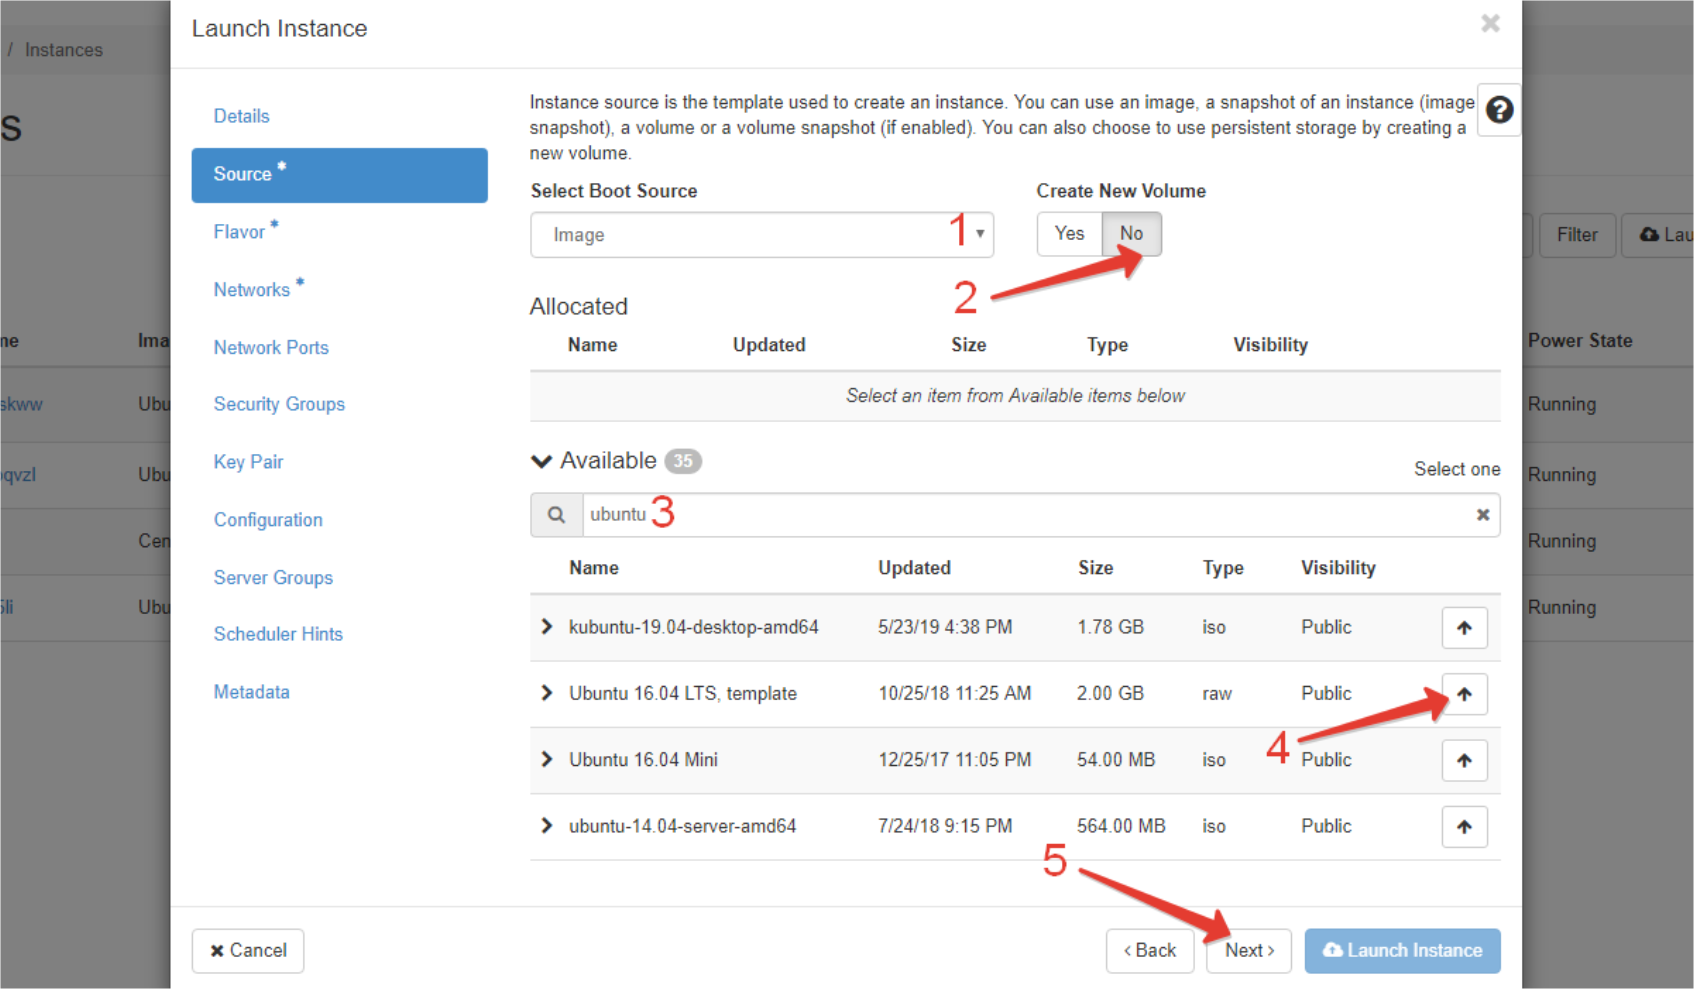
- In the "Select Boot Source" field select "Image" (step-1)
in the "Available" field enter "ubuntu" (step-3) in order to find more easily the recommended image "Ubuntu 16.04 LTS, template" in the filtered list
choose the image in the filtered list by clicking on the button next to "Ubuntu 16.04 LTS, template" (step-4)
click on the "Next" button (step-5) to continue.
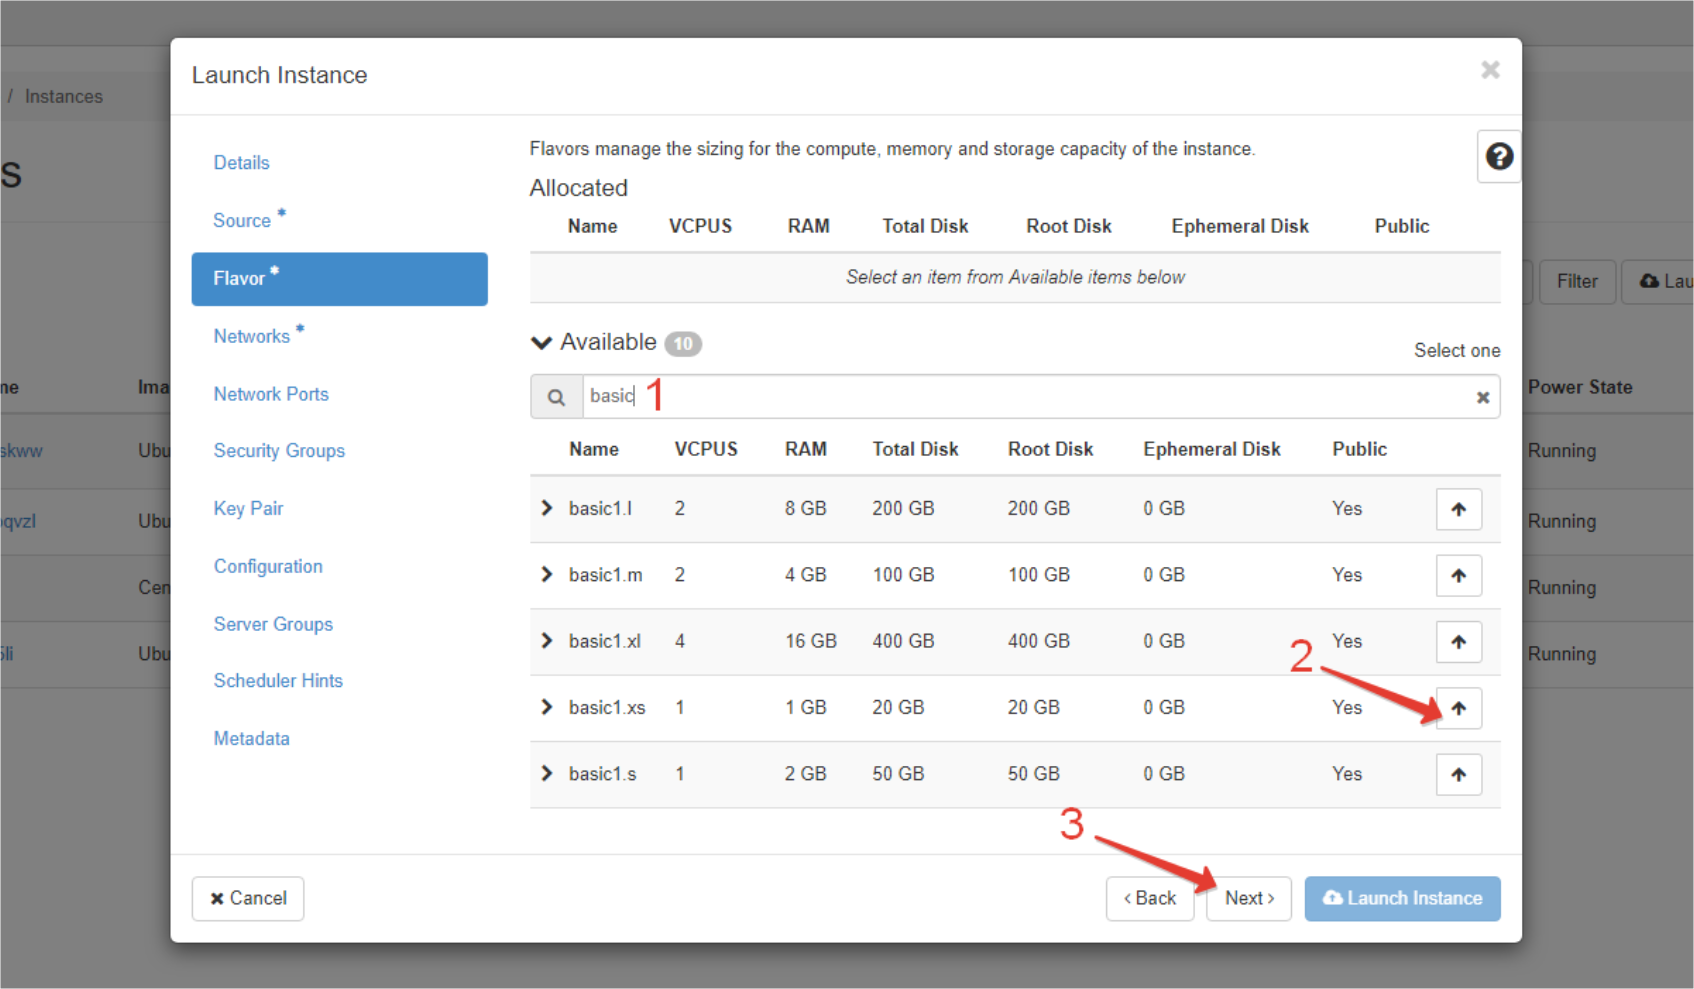
- A tab with a list of server configuration templates will open. In the Available field enter “basic” (1). Click on the button next to "basic1.xs" (2) and click on the "Next" button (3) to continue.
- A tab with a list of available networks will open. Click on the button next to "external_network" (step-1) and click on the "Configuration" tab (step-2).
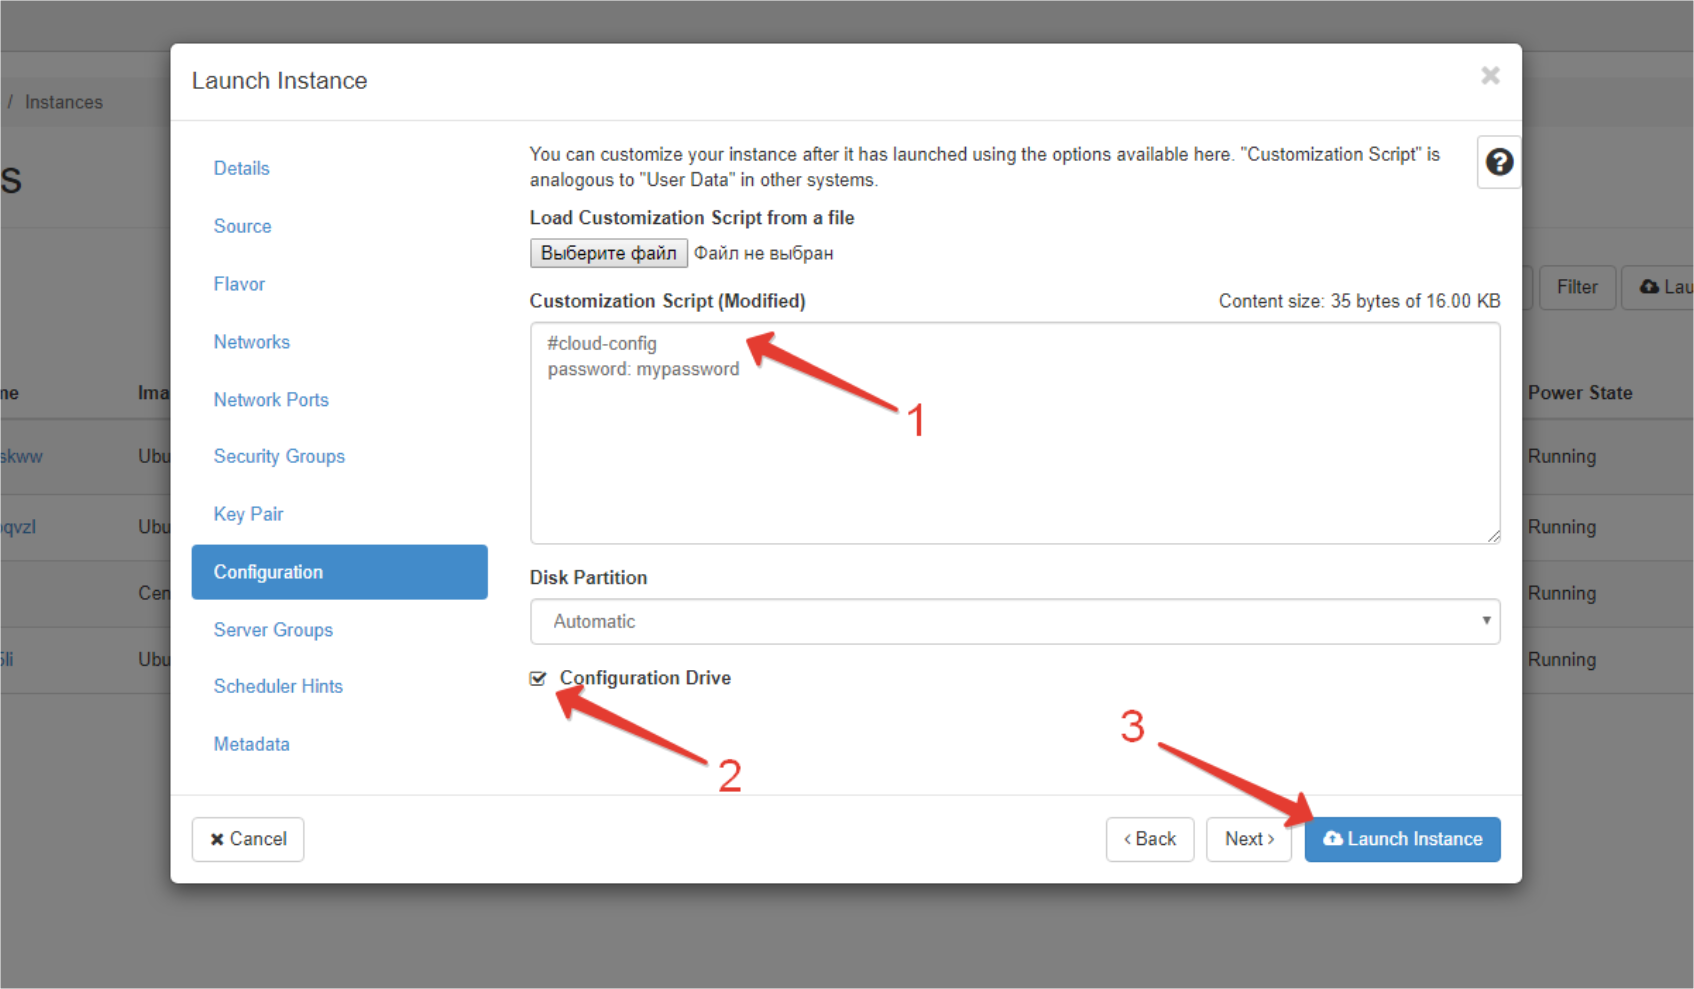
In the "CustomizationScript" field from the "Configuration" tab enter the following code lines (step-1):
#cloud-config
password: mypassword
Ensure yourself that you have ticked the “ConfigurationDrive” field (step-2) and finally click on the “LaunchInstance” button (step-3).- Wait until the status of the new virtual server changes to "Active".
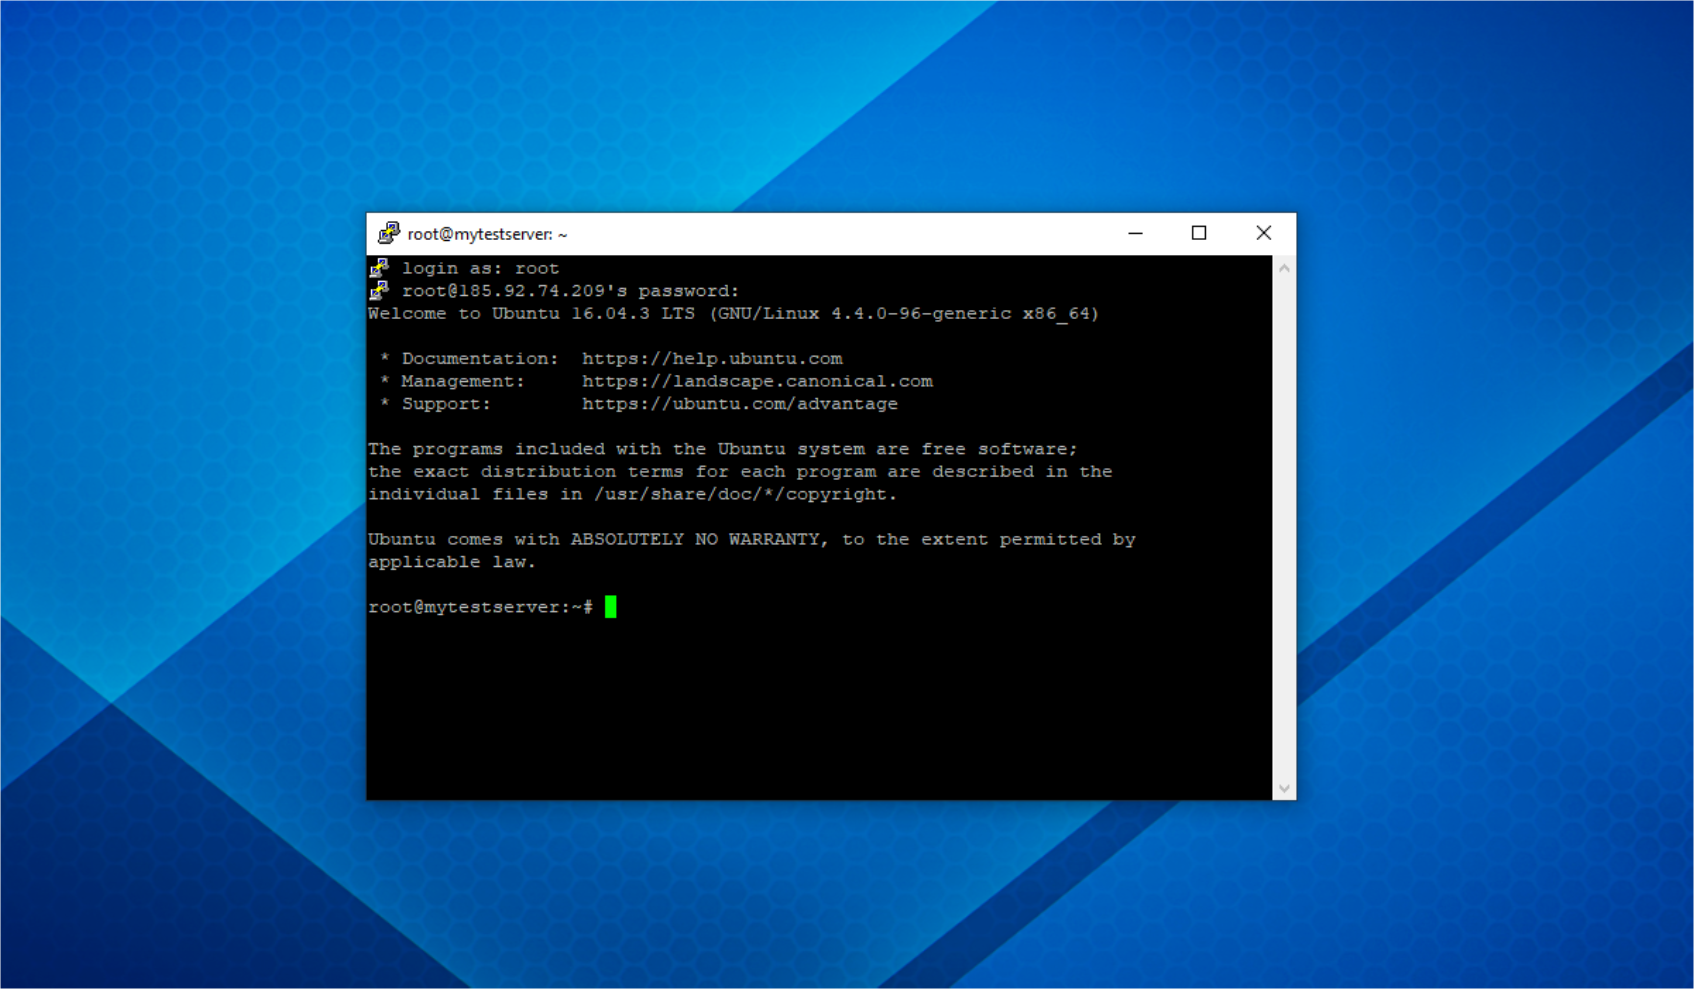
- Connect to the virtual server using "Putty" SSH client that provides a remote access to the server.
Congratulations! You have just created a brand-new server and connected to it via SSH!
Our opinion:
Horizon Control Panel is a complete tool to manage your cloud infrastructure without limits. Its functionality will satisfy the needs of advanced users and at the same time Horizon provides a more illustrative graphical interface than the command line.