Loadbalancer Octavia is a component of OpenStack that provides the ability to distribute network traffic among multiple virtual machines (VMs) or other endpoints in your OpenStack infrastructure. The load balancer can be used to distribute traffic between multiple instances of an application or service, improving performance, fault tolerance, and scalability of the system.
The virtual instance that acts as the actual load balancer in Octavia is called an Amphora. It is automatically created when a load balancer is provisioned, managed by Octavia, and ensures efficient traffic distribution between servers. Amphora operates in an isolated environment, providing security and isolation between different load balancers.
Using the Load Balancer Octavia allows you to improve the performance, fault tolerance, and scalability of your applications by providing load balancing and automatic traffic regulation within your OpenStack cloud.
Creation and Configuration of OpenStack Load Balancer within Public Cloud (IaaS) Service
We will demonstrate the most commonly used method to create an HTTP load balancer with URL redirection using OpenStack Horizon, and also replicate these actions through the OpenStack CLI
OpenStack Horizon is a web interface that provides graphical access to OpenStack features and resources for managing cloud infrastructure.
For more details on how to log in to Horizon, you can refer to the article How to Create a Virtual Server in Horizon Dashboard
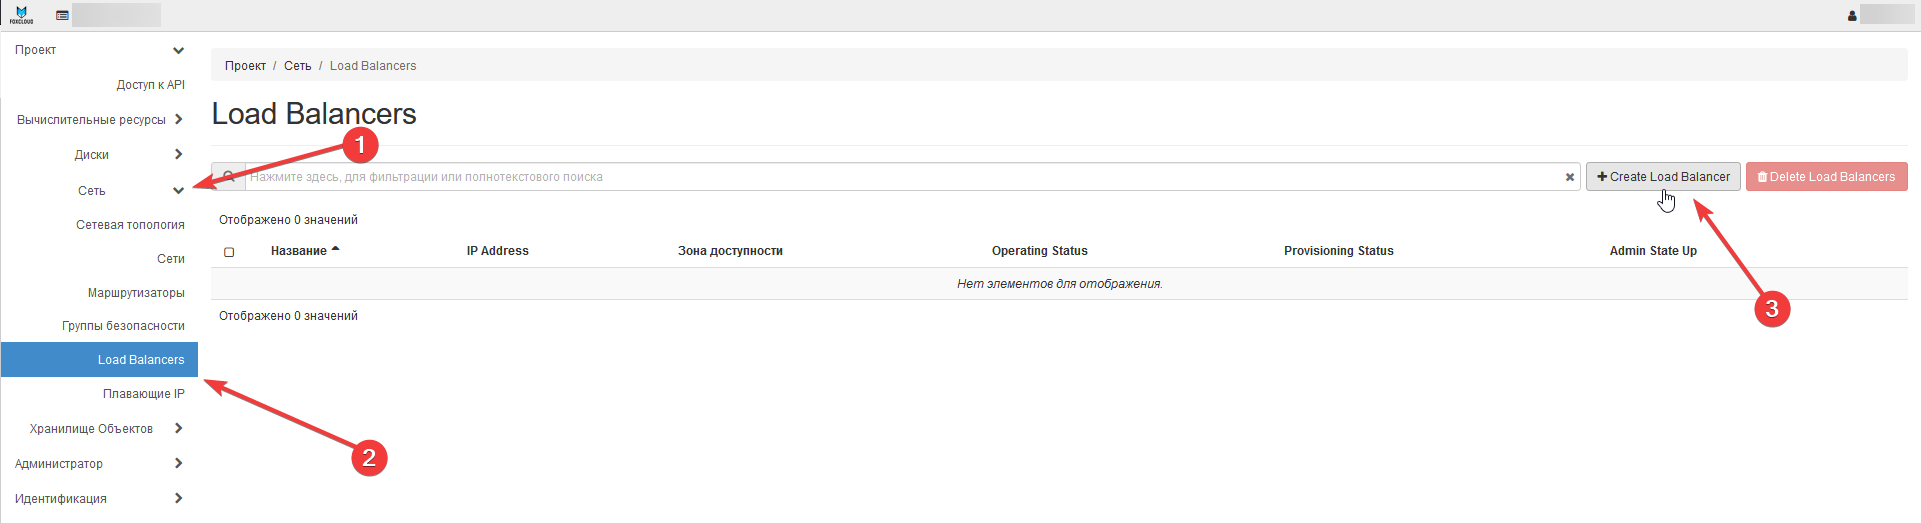
Step 1: Log in to the Horizon dashboard
Step 2: Click on the "Network" tab -> "Load Balancers" -> "Create Load Balancer."
Step 3: In the open load balancer creation window, enter the required information:
1 - Load Balancer Name: Enter the name of the load balancer
2 - Load Balancer Description: Provide a description for the load balancer
3 - elect Instance Type: Choose between two options 1. Standalone (non-redundant, with one amphora instance) и 2. Active-standby (redundant load balancer with two amphora instances)
4 - Select Subnet: Choose the subnet in which the load balancer will be created. It is important that there are free IP addresses in this network.
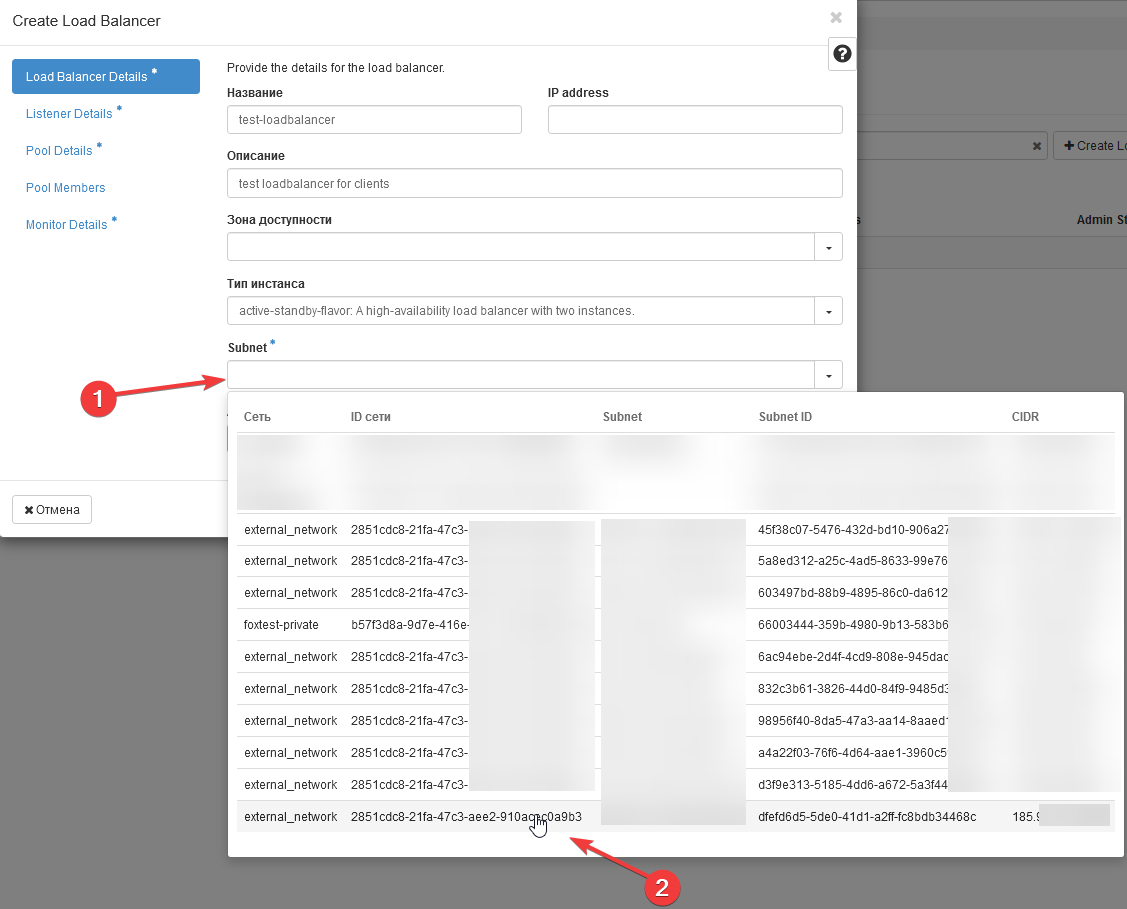
5 - IP Address Field: You can leave this field empty, and an IP will be allocated from the IP address pool of the specified subnet. Alternatively, if you wish to assign your own IP from the OpenStack network, specify it.
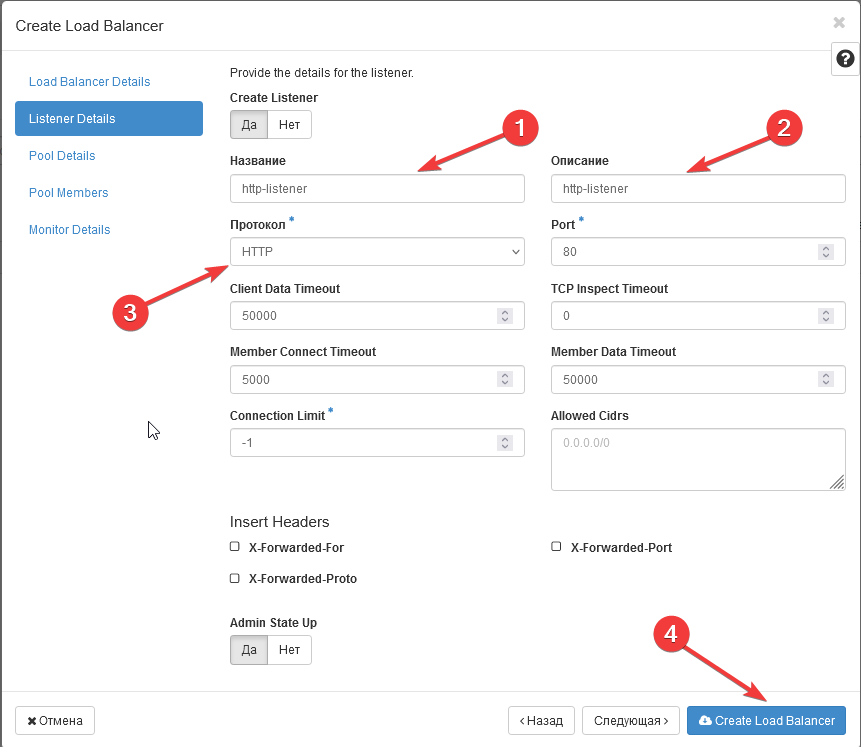
6 - Create Listener (Listener Details): Specify the name and protocol (in our case, HTTP) -> In the next tab "Pool Details" under "Create Pool," select "No" (in this example, a pool is not required) -> Click "Create Load Balancer."
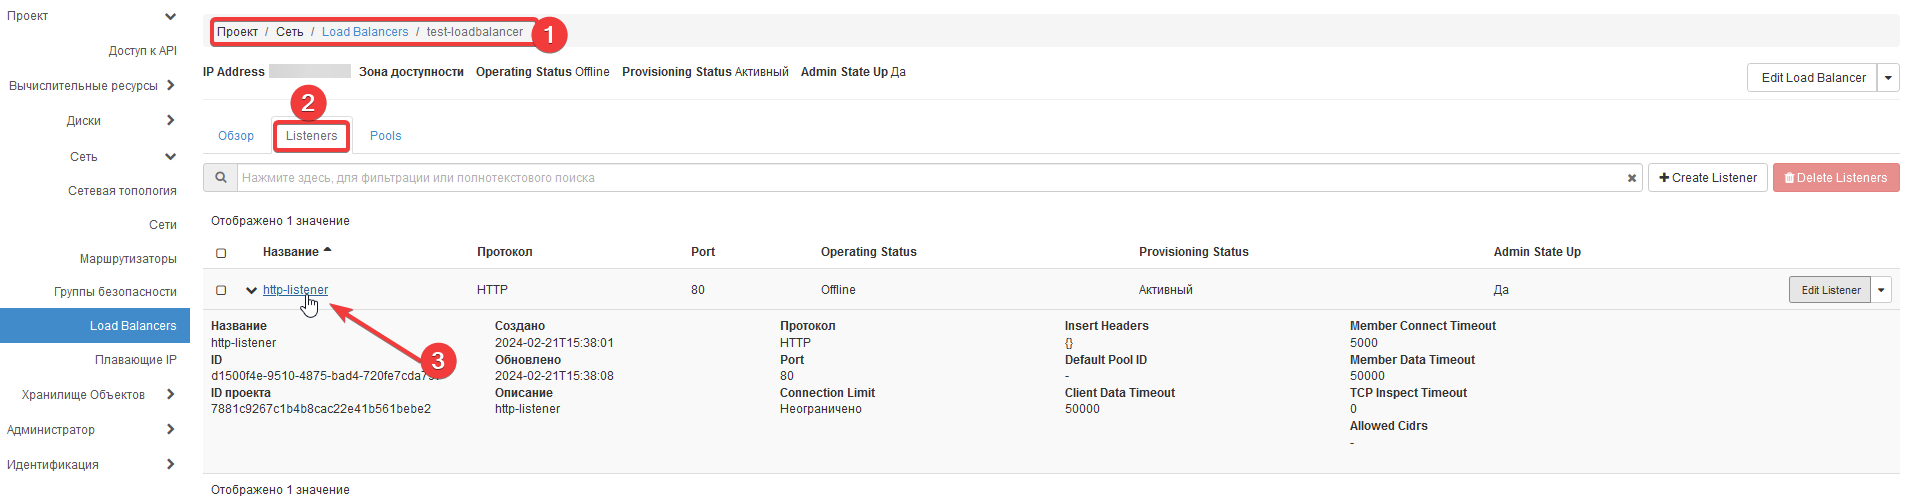
7 - The load balancer is created. Wait for the status to be "Active" in the "Provisioning Status" to continue the configuration.

Step 4: Configuring the Load Balancer
1. Add an L7 rule for the listener that will redirect the request to another resource (redirect).
Select your load balancer -> Listeners -> Select the created listener (click on it)
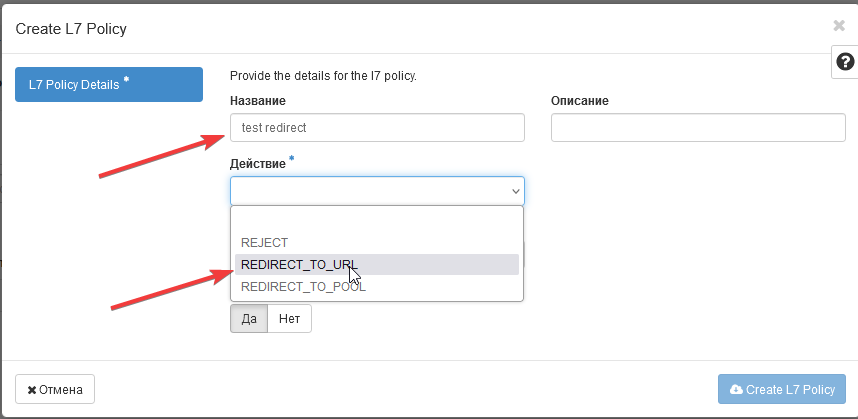
2. In the opened window, go to the L7 Policies tab -> Create L7 Policy.

3. Create an L7 policy
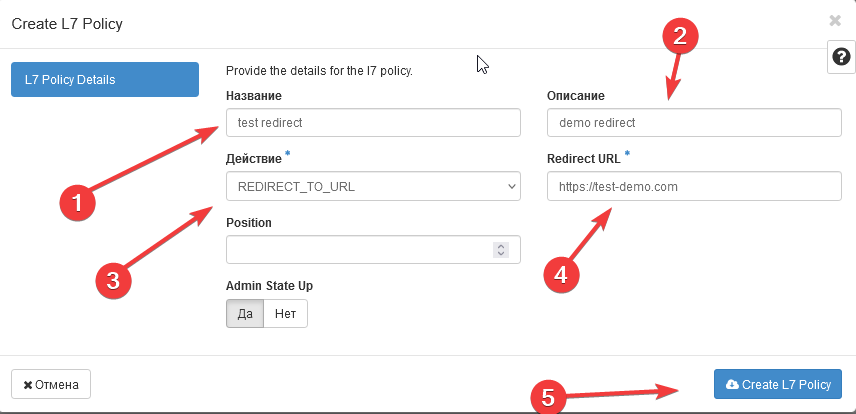
In the opened window, specify:
- Policy Name
- Description
- Action (in our demonstration case - REDIRECT_TO_URL)
- Specify the Redirect URL
- Position will be automatically set to 1
- Click "Create L7 Policy"
This completes the creation and configuration of the load balancer.
Step 5: ВPerform a Check Using curl
$ curl -I <loadbalancer_ip>
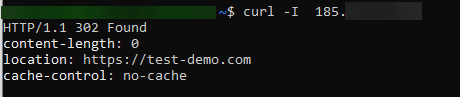
The request is successfully redirected.
openstack loadbalancer create --name <loadbalancer> --vip-subnet-id  <subnet_id> --description "description"
openstack loadbalancer listener create --protocol HTTP --protocol-port 80 --name <name for listener> <loadbalancer>
openstack loadbalancer l7policy create --action REDIRECT_TO_URL --redirect-url "https://domain.com" --name <name for policy> <listener>
openstack loadbalancer l7rule create --compare-type STARTS_WITH --type PATH --value "/" <policy-name>
This set of instructions provides a simple and effective solution for creating a basic HTTP load balancer using Octavia. It is recommended to follow the instructions step-by-step to ensure correct deployment and reliable web traffic load balancing between your servers.
Step 1: Prepare the platform from which you will manage your Public Cloud and install the OpenStack utility.
This could be a ready-made virtual server or even a personal computer.
You can do this using the instructions Server creation via Openstack CLI (command line)
Step 2: Create a Load Balancer
Create a load balancer named <lb1> that will be accessible from the internet:
openstack loadbalancer create --name <lb1> --vip-subnet-id <public-subnet>
Wait for the load balancer to achieve ACTIVE and ONLINE statuses.
openstack loadbalancer show <lb1>
Step 3: Create a Listener
Create a listener named <listener1> that will listen for incoming HTTP requests on port 80:
openstack loadbalancer listener create --name <listener1> --protocol HTTP --protocol-port 80 <lb1>
Step 4: Create a Pool
Create a pool named <pool1> that will serve as the default pool for the listener <listener1>:
openstack loadbalancer pool create --name <pool1> --lb-algorithm ROUND_ROBIN --listener <listener1> --protocol HTTP
Step 5: Add Pool Members
Add servers <192.0.2.10> and <192.0.2.11>, configured with an application on port 80, to the pool <pool1>.
openstack loadbalancer member create --subnet-id <private-subnet> --address 192.0.2.10 --protocol-port 80 <pool1>
openstack loadbalancer member create --subnet-id <private-subnet> --address 192.0.2.11 --protocol-port 80 <pool1>
Step 6: Check the Load Balancer:
You can check the load balancer using the method described above:
$ curl -I <loadbalancer_ip>