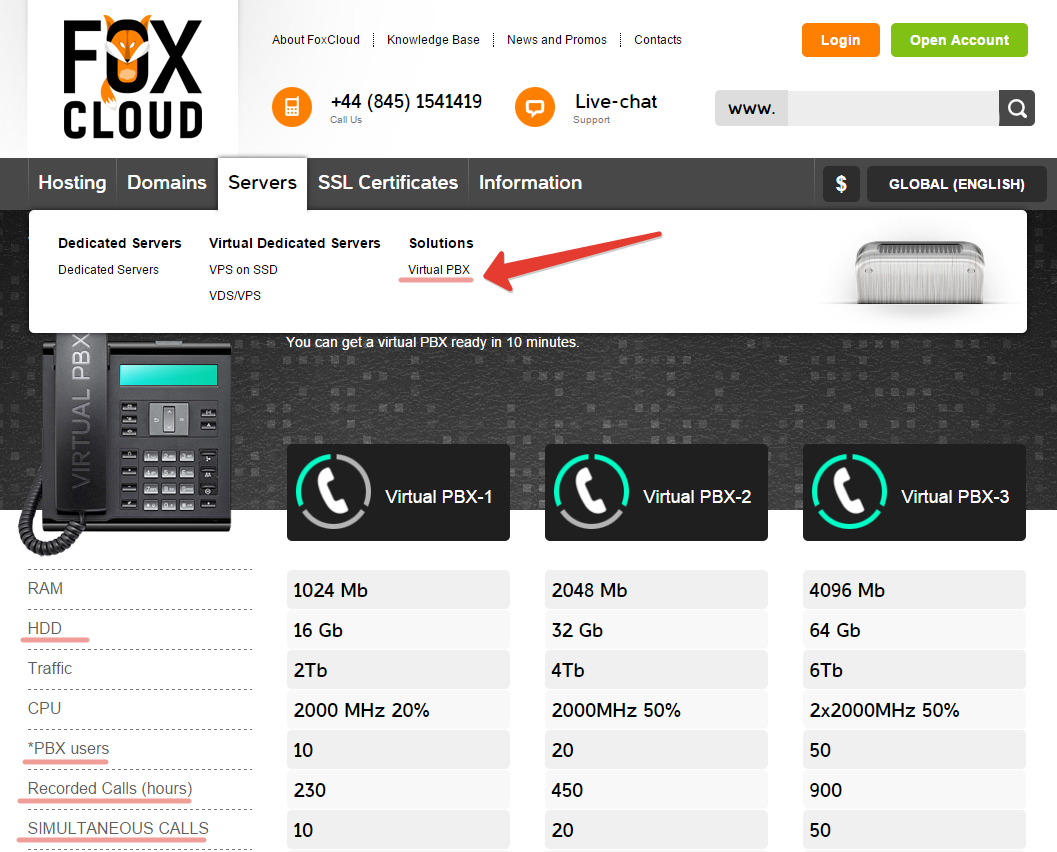
If you want to order "Virtual PBX" open "Servers > Solutions > Virtual PBX".

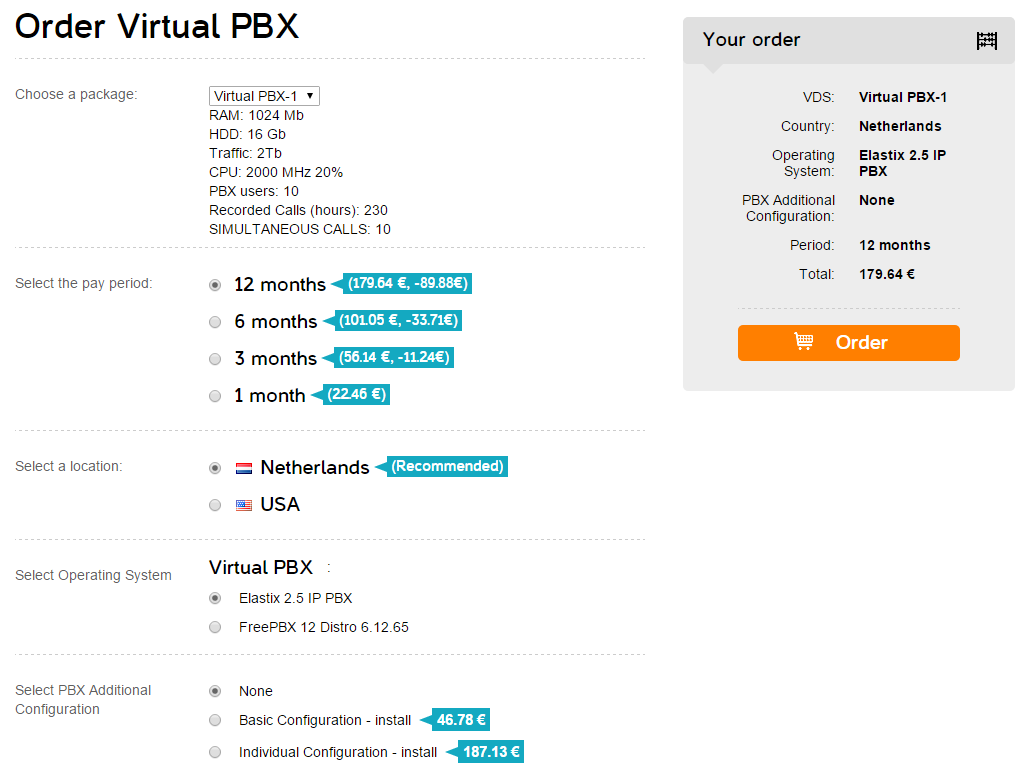
Select details proceeding optimal user count of PBX, phone call time recording, simultaneously recieve calls. Click "Order" button and go to next step of ordering

The longer pay period means the higher discount, location of your server based on requirements (your location, directions of incoming and outcoming calls, client location and e.t.c.). Default OS is "FreePBX 12 Distro". If you have questions here you may contact support.
If all details are selected next press "Order" and go to billing order page

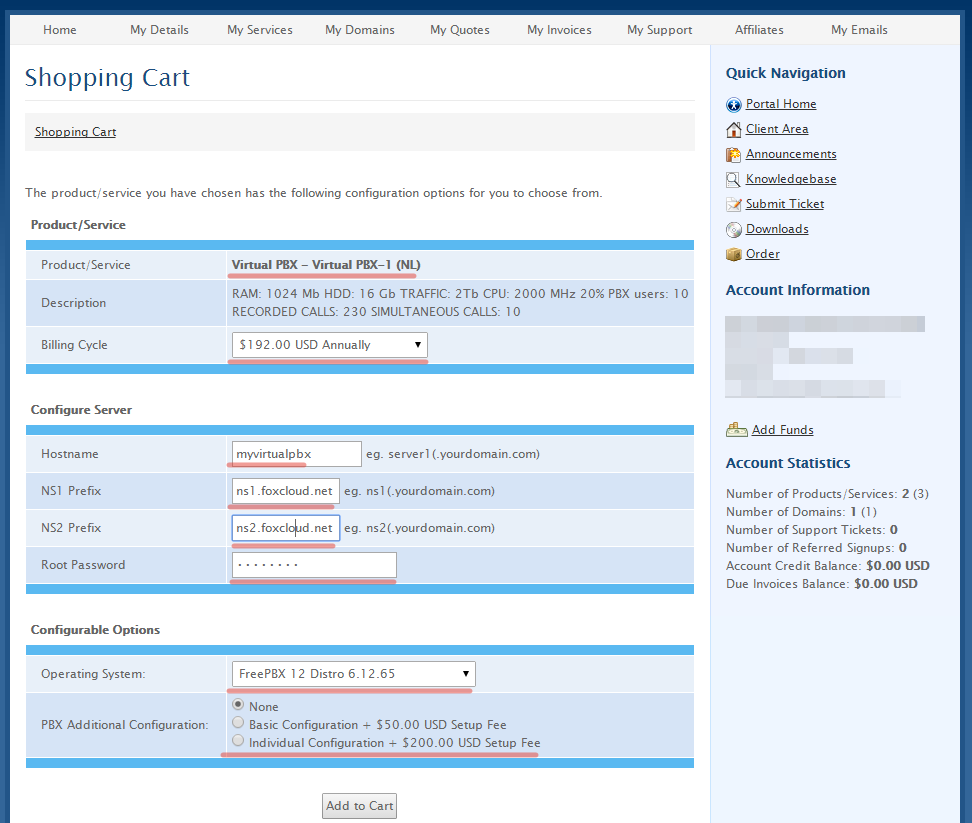
Fill 4 fields:
Host name: myvirtualpbx ( any host name)
Prefix NS1: ns1.foxcdn.net
Prefix NS2: ns2.foxcdn.net
Administrator password: mysecretpassword ( password for user root)
Leave other fields without changes
Press "Add to Cart", go to "Cart", press "Checkount".
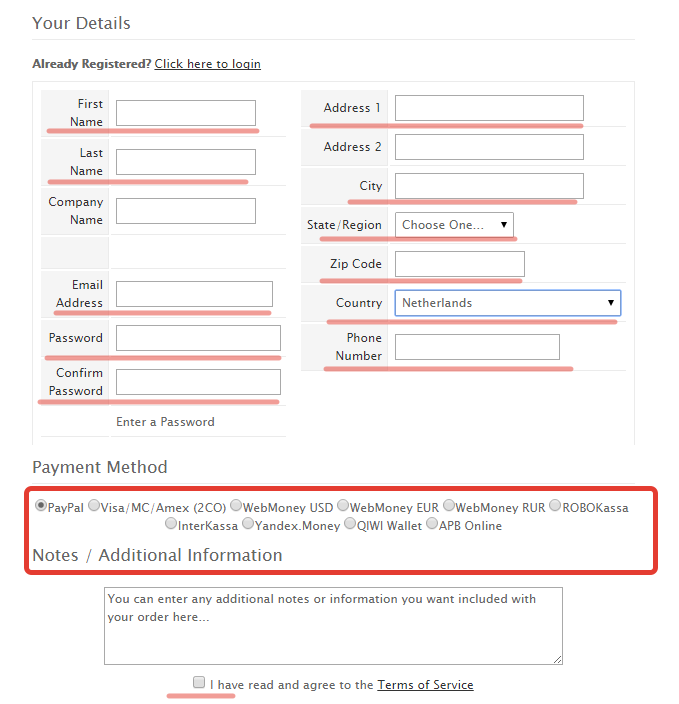
If you are not authorized in billing system ( in your account) login or register by filling all required fields and specify the way of payment.

After you filled all fields, select a way of payment, read and agree the Terms of Service, click "Complete" and after you proceed to the immediate payment of order to page of invoices.
Next you will recieve the email with default access to installed "Virtual PBX" with further instructions "How to Connect and access to the control panel of Virtual PBX"
If you have any questions you can always connect to our experts for advice and assistance.


