1. First, you need to choose what type of virtual server you need. To view the available options, place the cursor over «Servers» menu item, then select «SSD Virtual Servers» from the drop-down menu.
2. Further, you can view background information. The page contains 3 most popular types of VPS. To get information on all offered servers, click «All tariff plans».
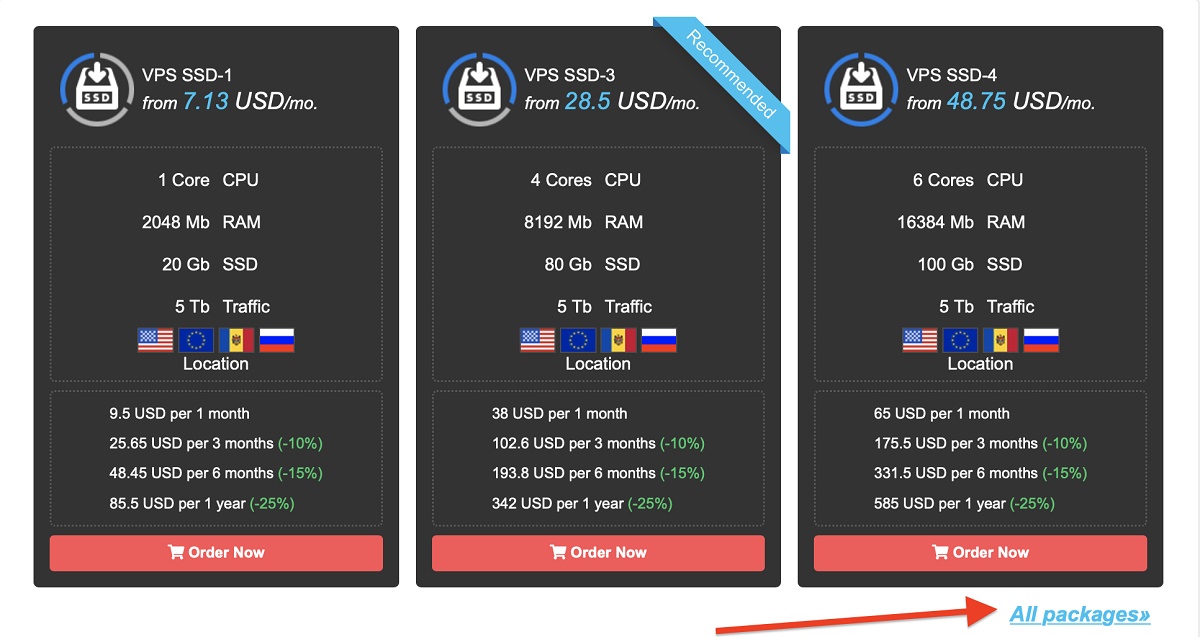
3. Select a convenient tariff plan and click on «Order».

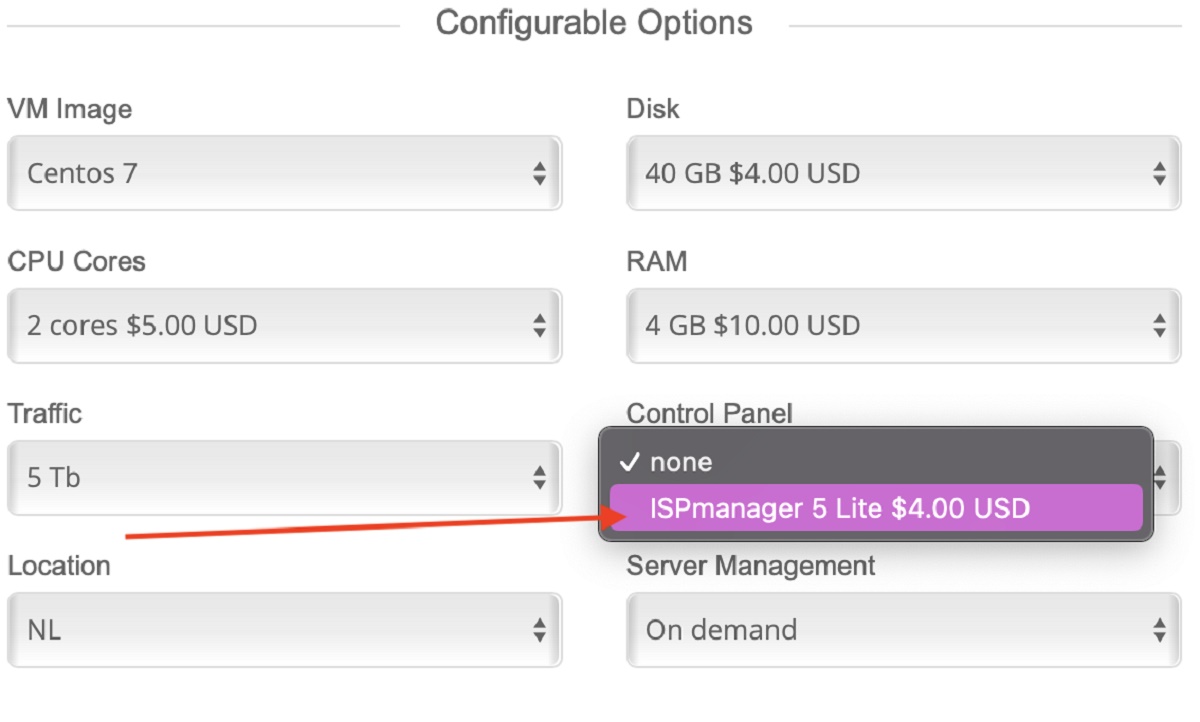
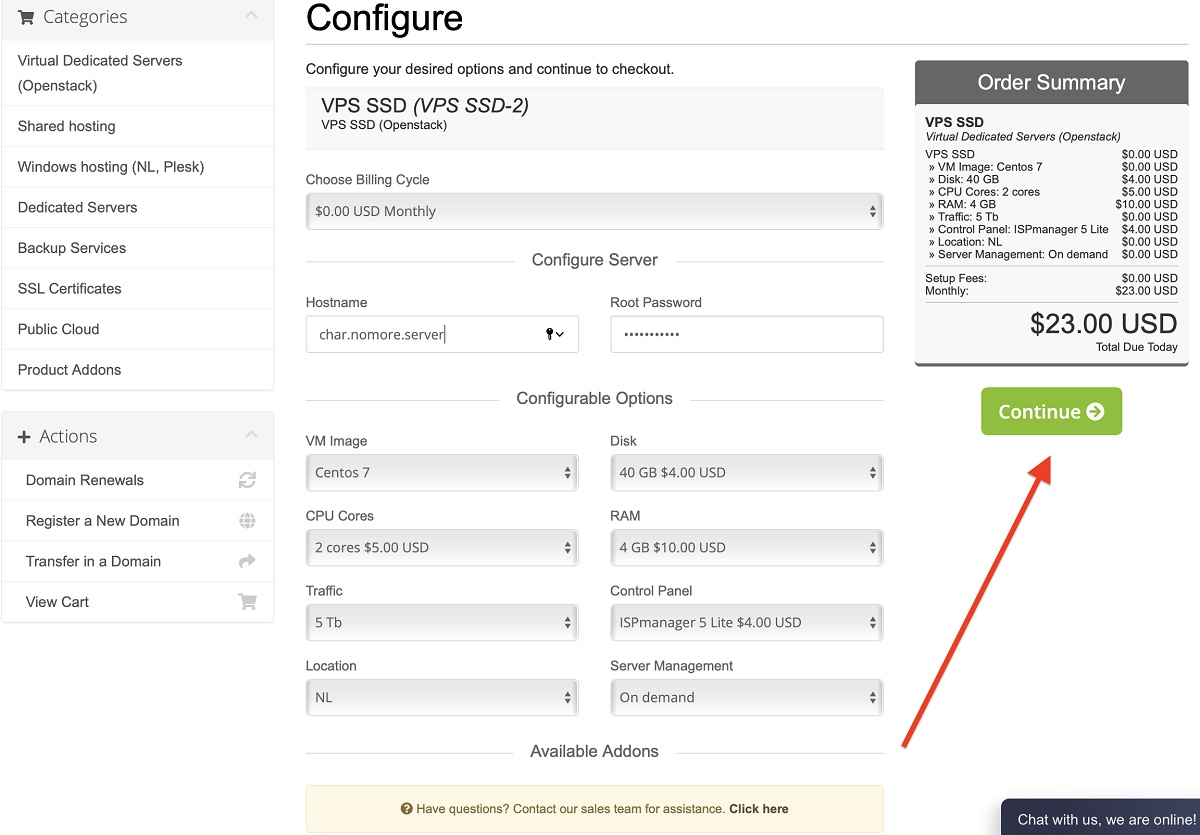
4. Next, you need to specify the future server parameters: OS system, required hard disk volume, processor parameters and RAM, server location.
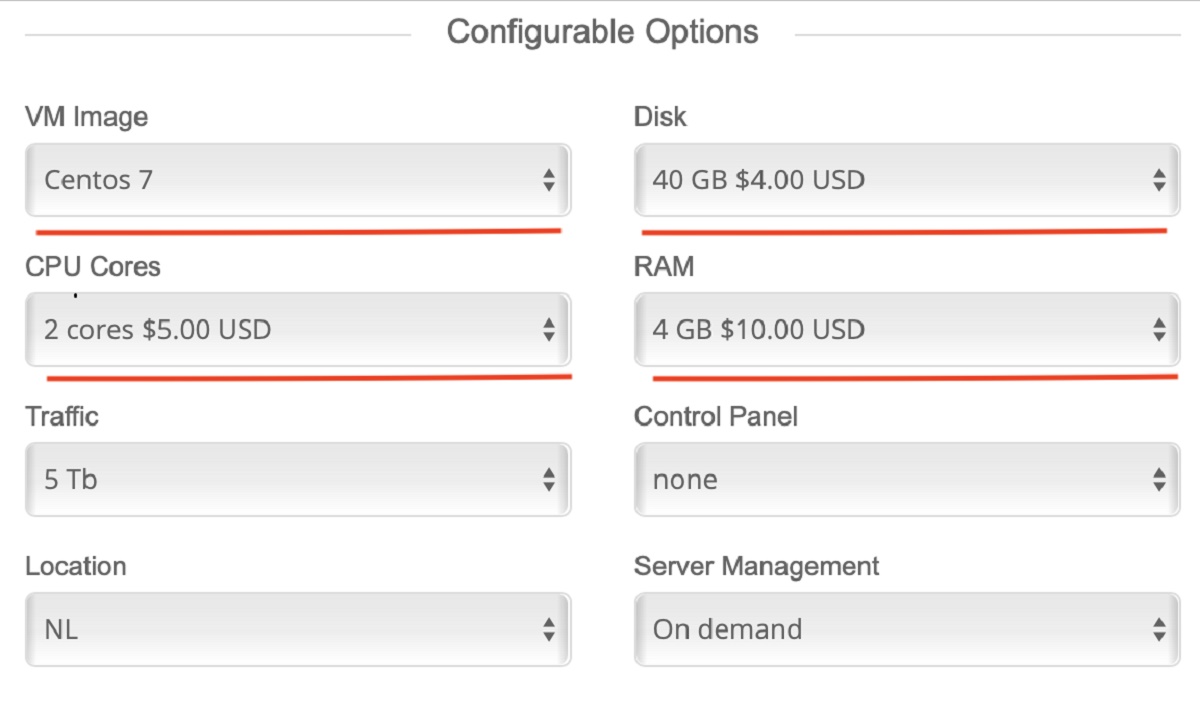
You can also connect IPSmanager. This is a server control panel due to which you can install CMS, can perform back up, edit files, etc.
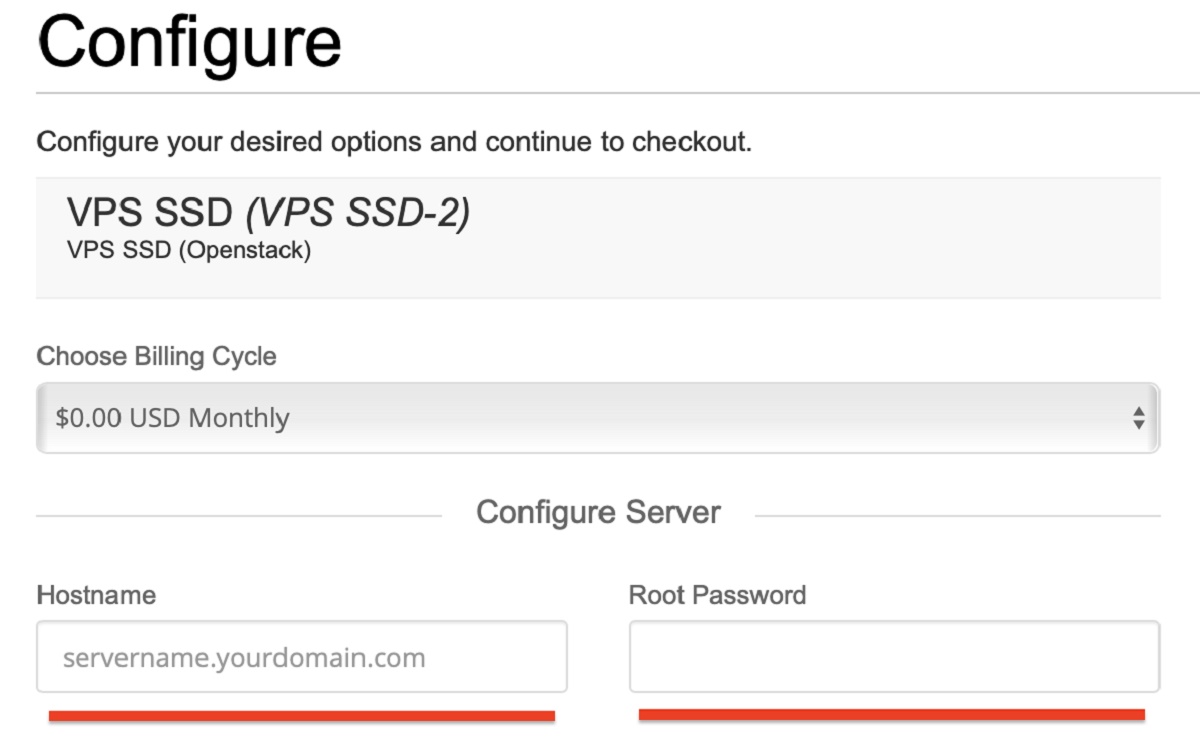
To ensure the correct order completion and the immediate operation of your server, we ask you to specify an access password and hosting name. You can choose any name at your discretion.
5. VPS price will be calculated after filling in all the parameters. To continue the order registration click «Next».
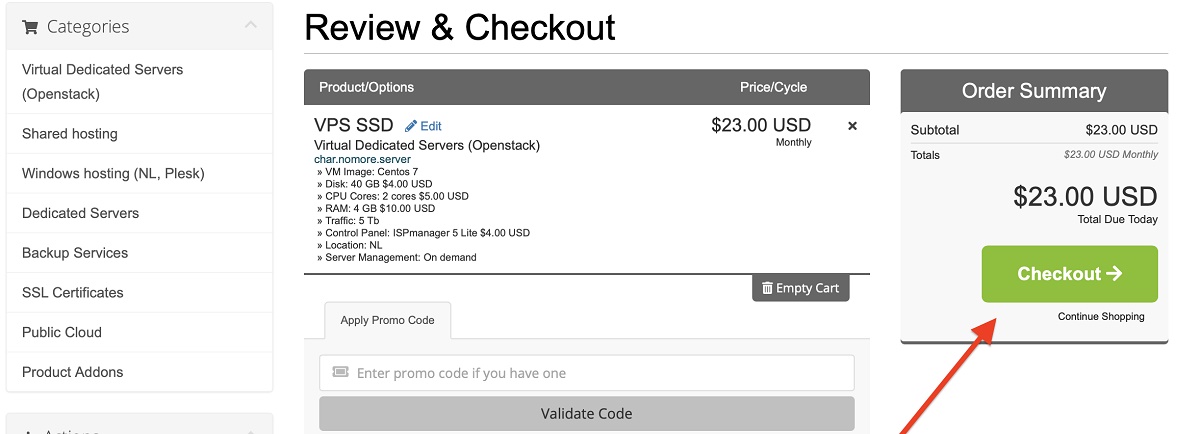
6. Next, you can check the specified server parameters and enter the promotional code if available. If everything is correct, click on «Place order».
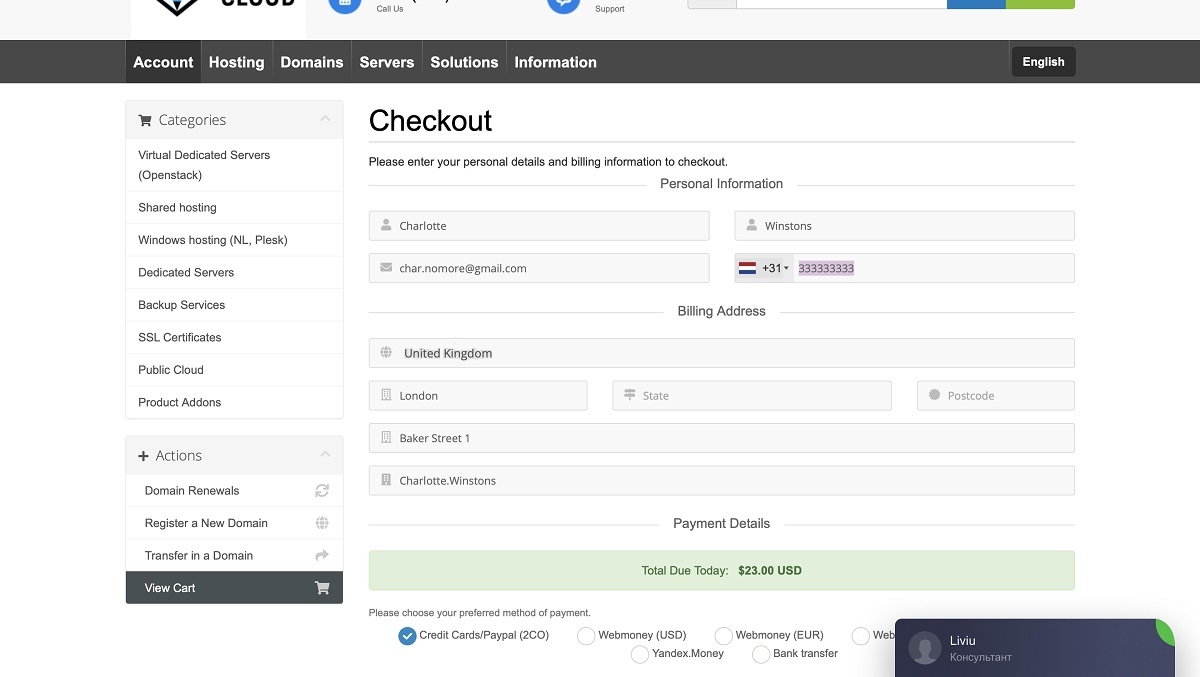
7. Further, you need to log in by clicking «Already registered? », if you already have a Fox Cloud account, or register. To register, enter your first name and last name, contact data, mailing address and create a password. Also here you can choose a payment method for your server, as well as provide additional information in comments. After filling in all the information, click on «Finalize order».
8. Next, an invoice will be generated for your order. You can pay for it by going to the payment service website that was selected at the previous step. To do this, click «Pay».
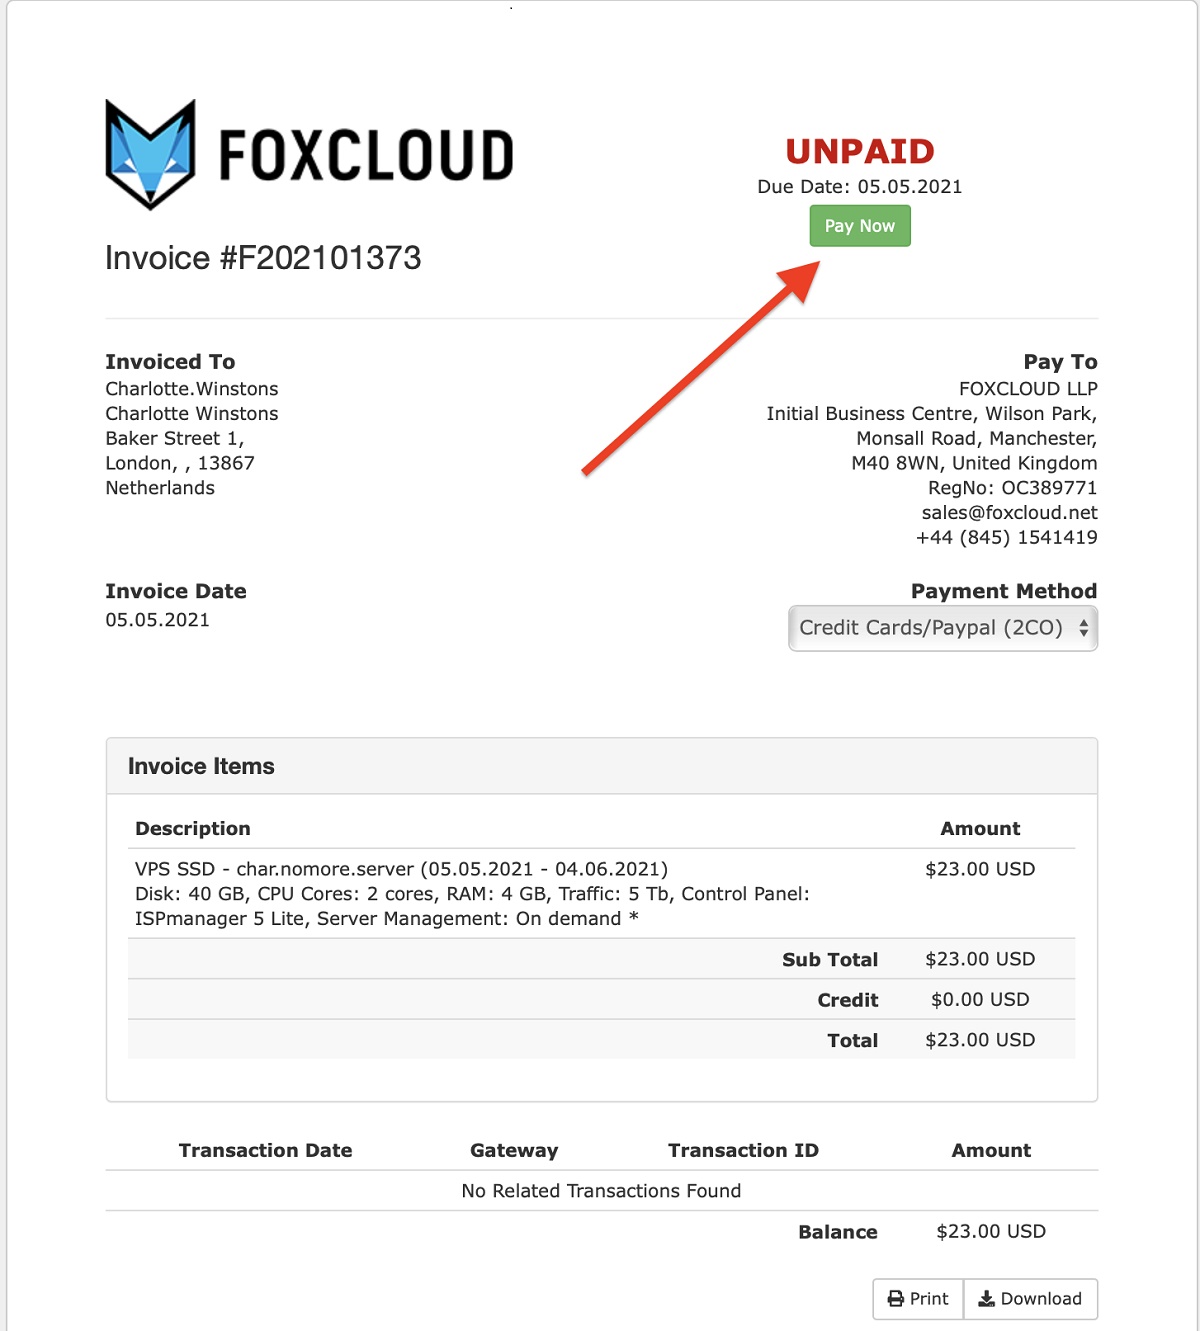
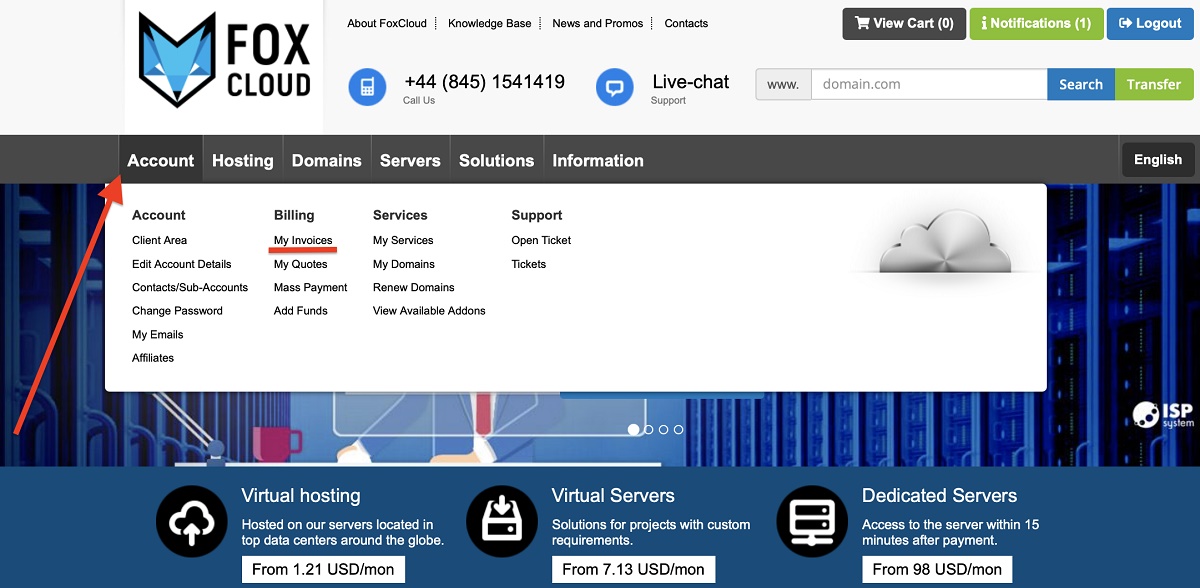
9. If for some reason you cannot pay the bill now, you can do it later. Invoices are saved in your personal account on «Account» - «My invoices» page.
10. After paying for invoice a letter with data access to your VPS will be sent to the specified email. If the letter arrives, then the server is already activated and you can start using it.